This manual guides the operator through the process of taking an order, sending it to the kitchen, adding more items later, and completing the payment.
¶ 1. Starting a New Order
Select a Table: From the main floor layout screen (pos-restaurant-main), tap or click on an Available table (e.g., Table 01 or 02) to start an order.
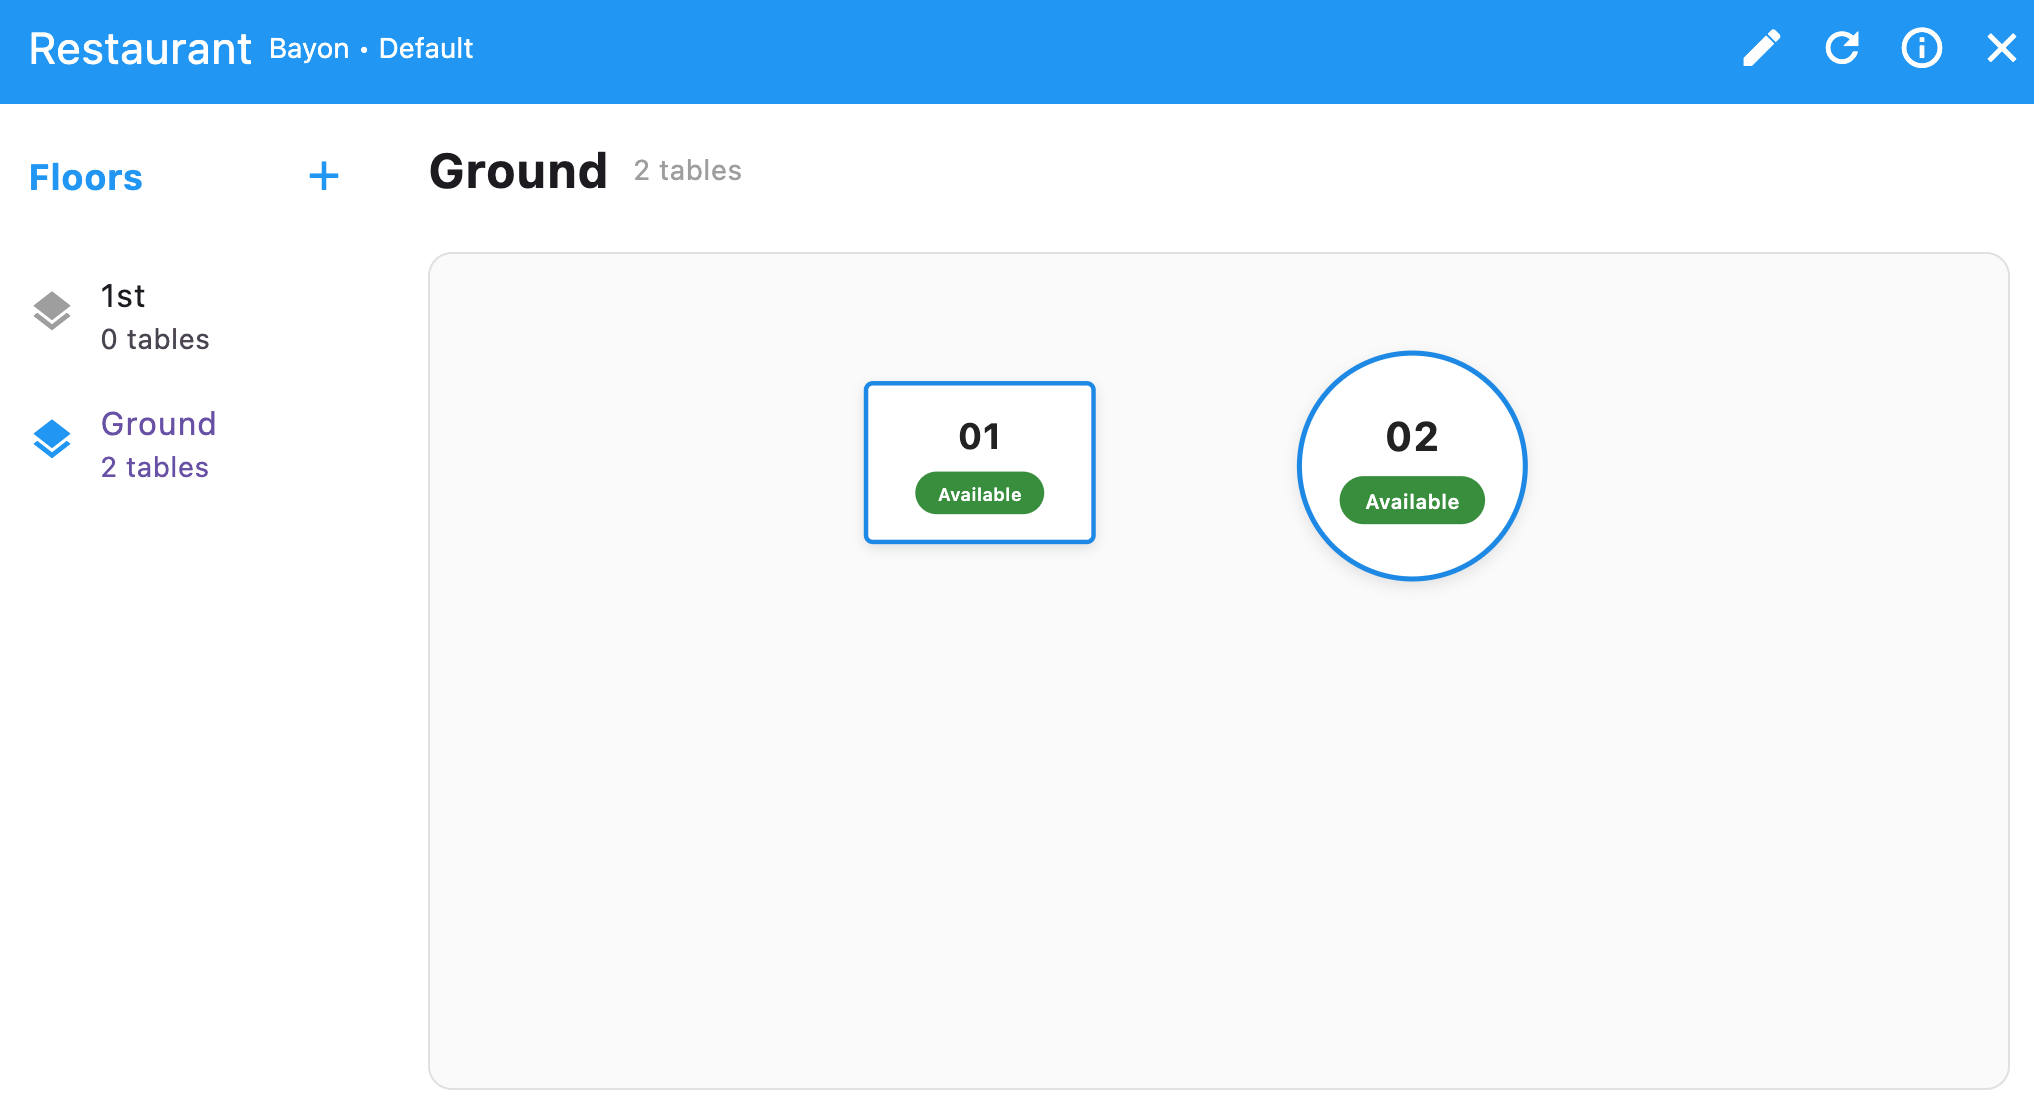
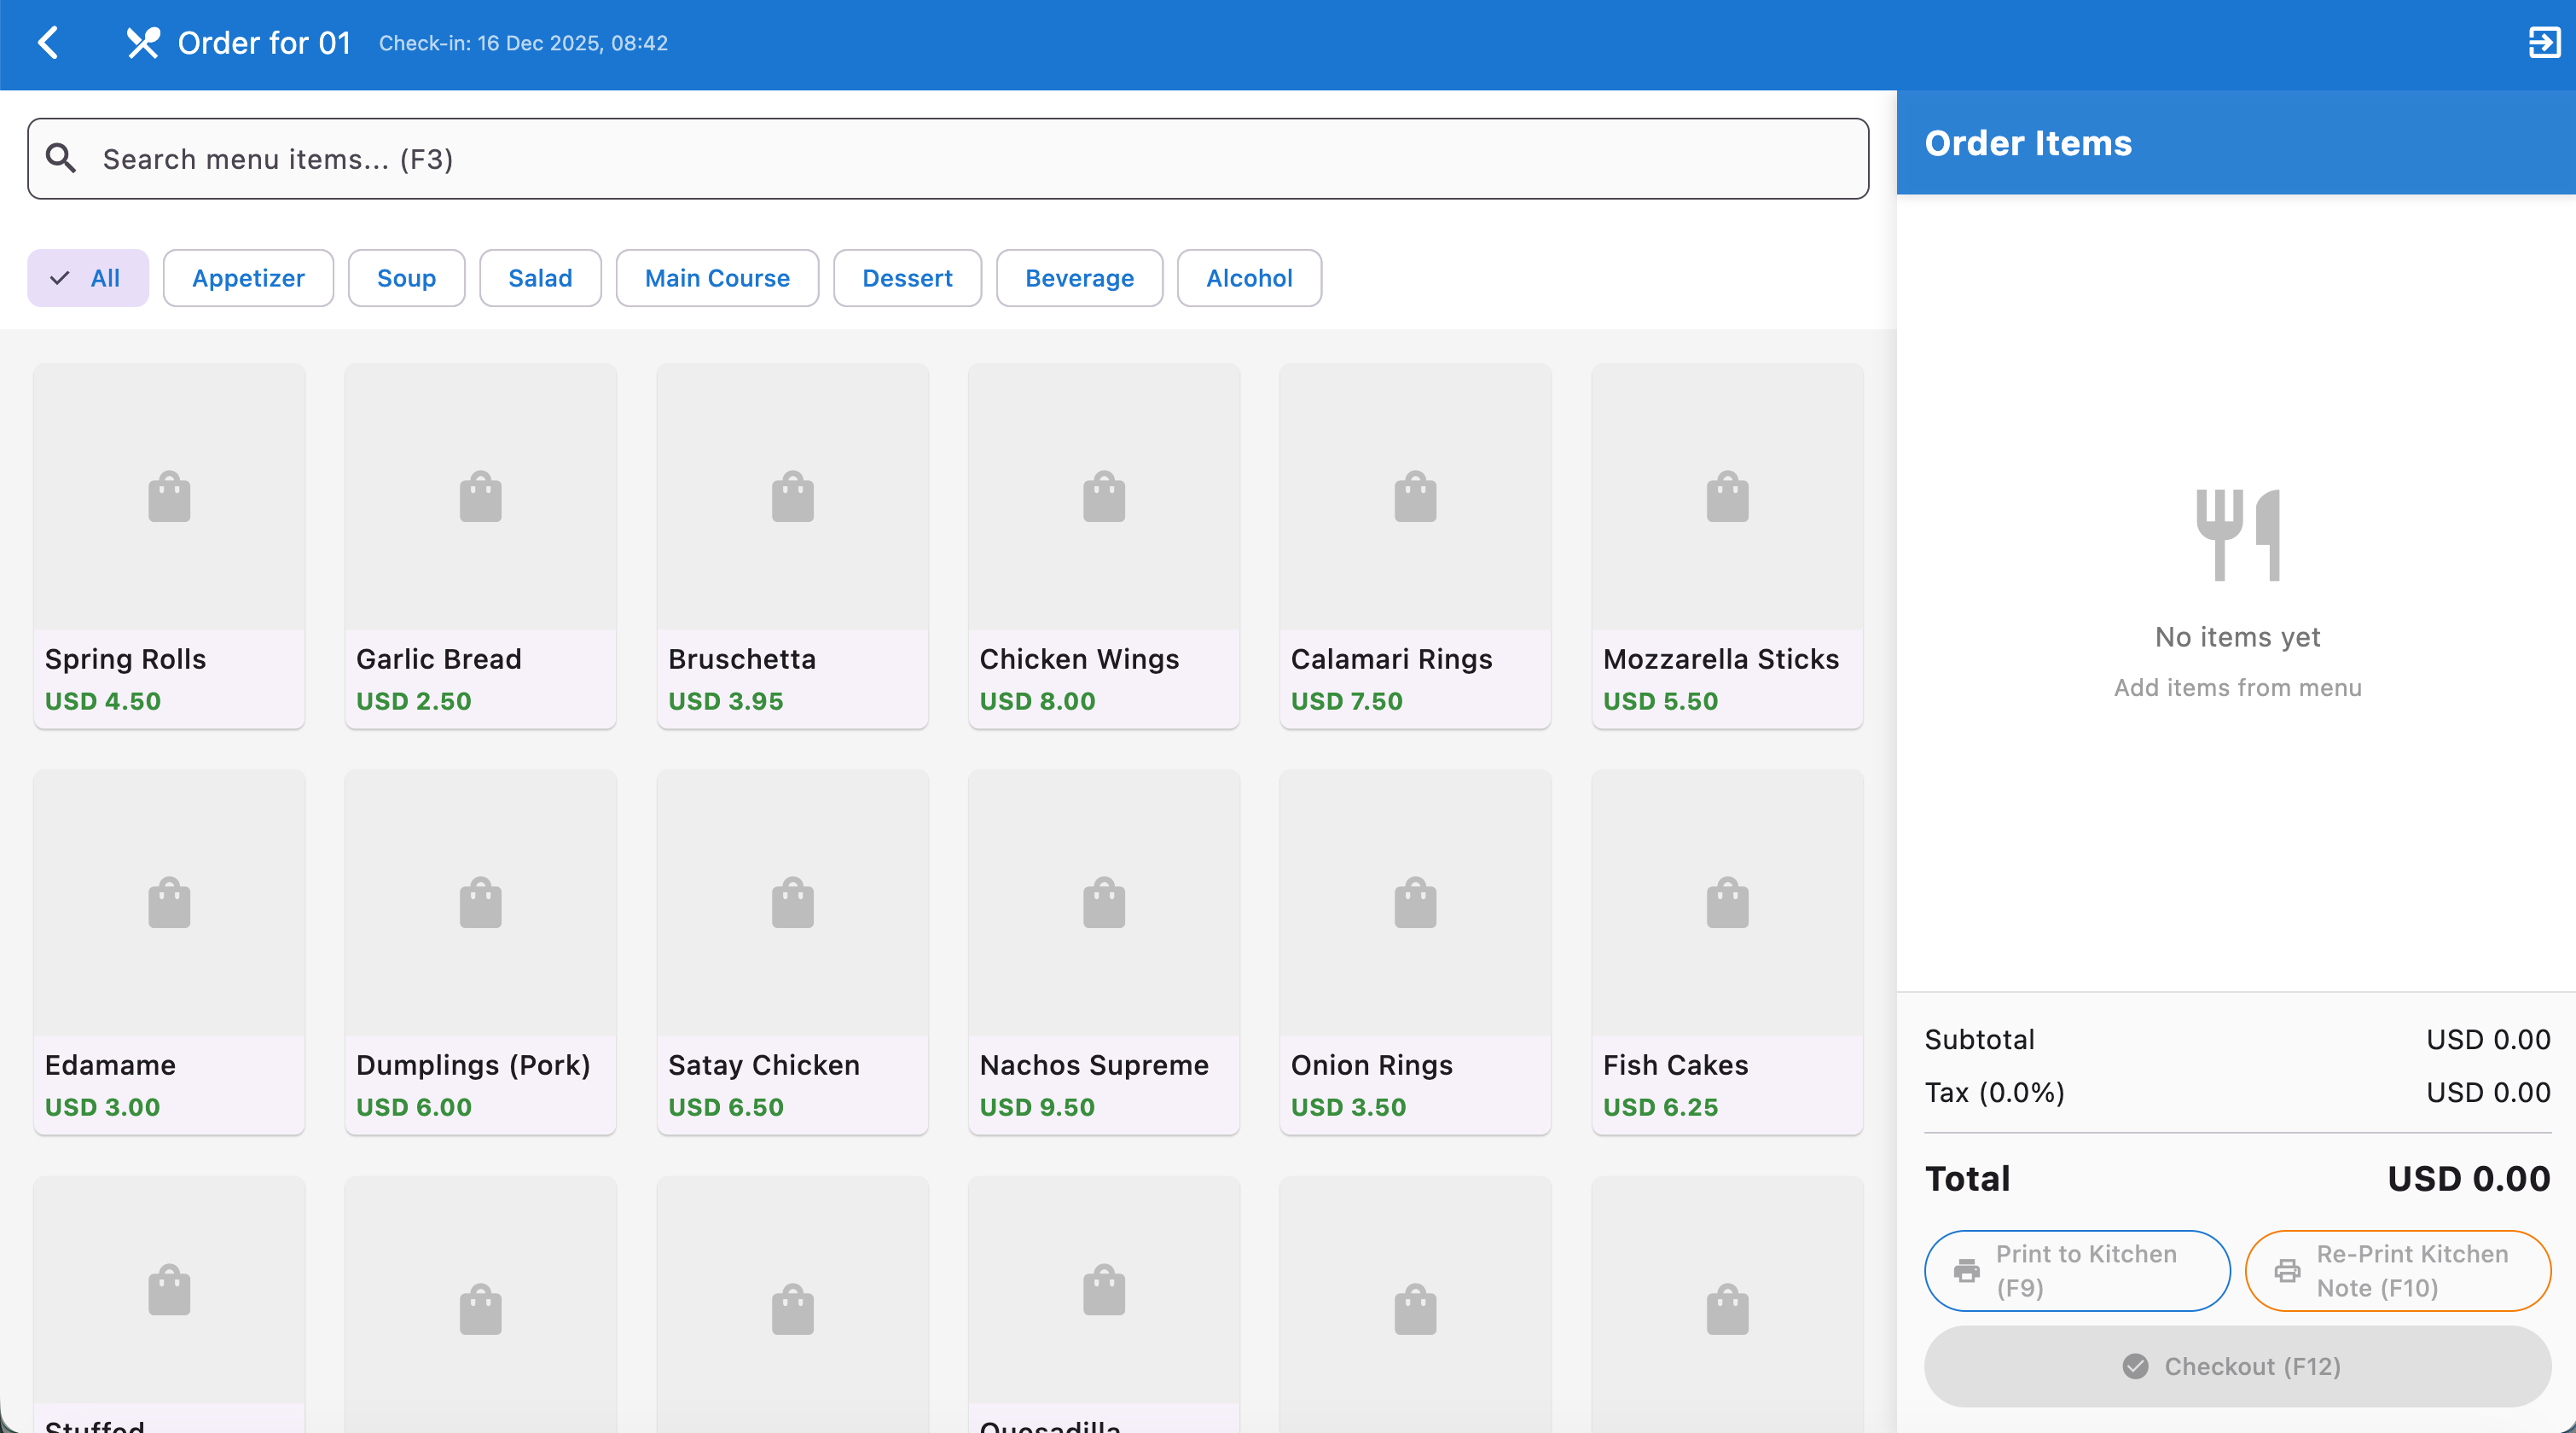
Access the Order Screen: This opens the order screen (pos-restaurant-order), which displays the menu on the left and the order items on the right.
¶ 2. Taking the Initial Order (1st time)
Add Items to the Order:
Browse the menu by category tabs (Appetizer, Soup, Main Course, Dessert, etc.) or use the Search menu items... (F3) field.
Click on a menu item to add it to the Order Items list on the right.
Example: For Table 02, the initial order might be Chicken Wings and Bruschetta (as seen in pos-restaurant-order-2).
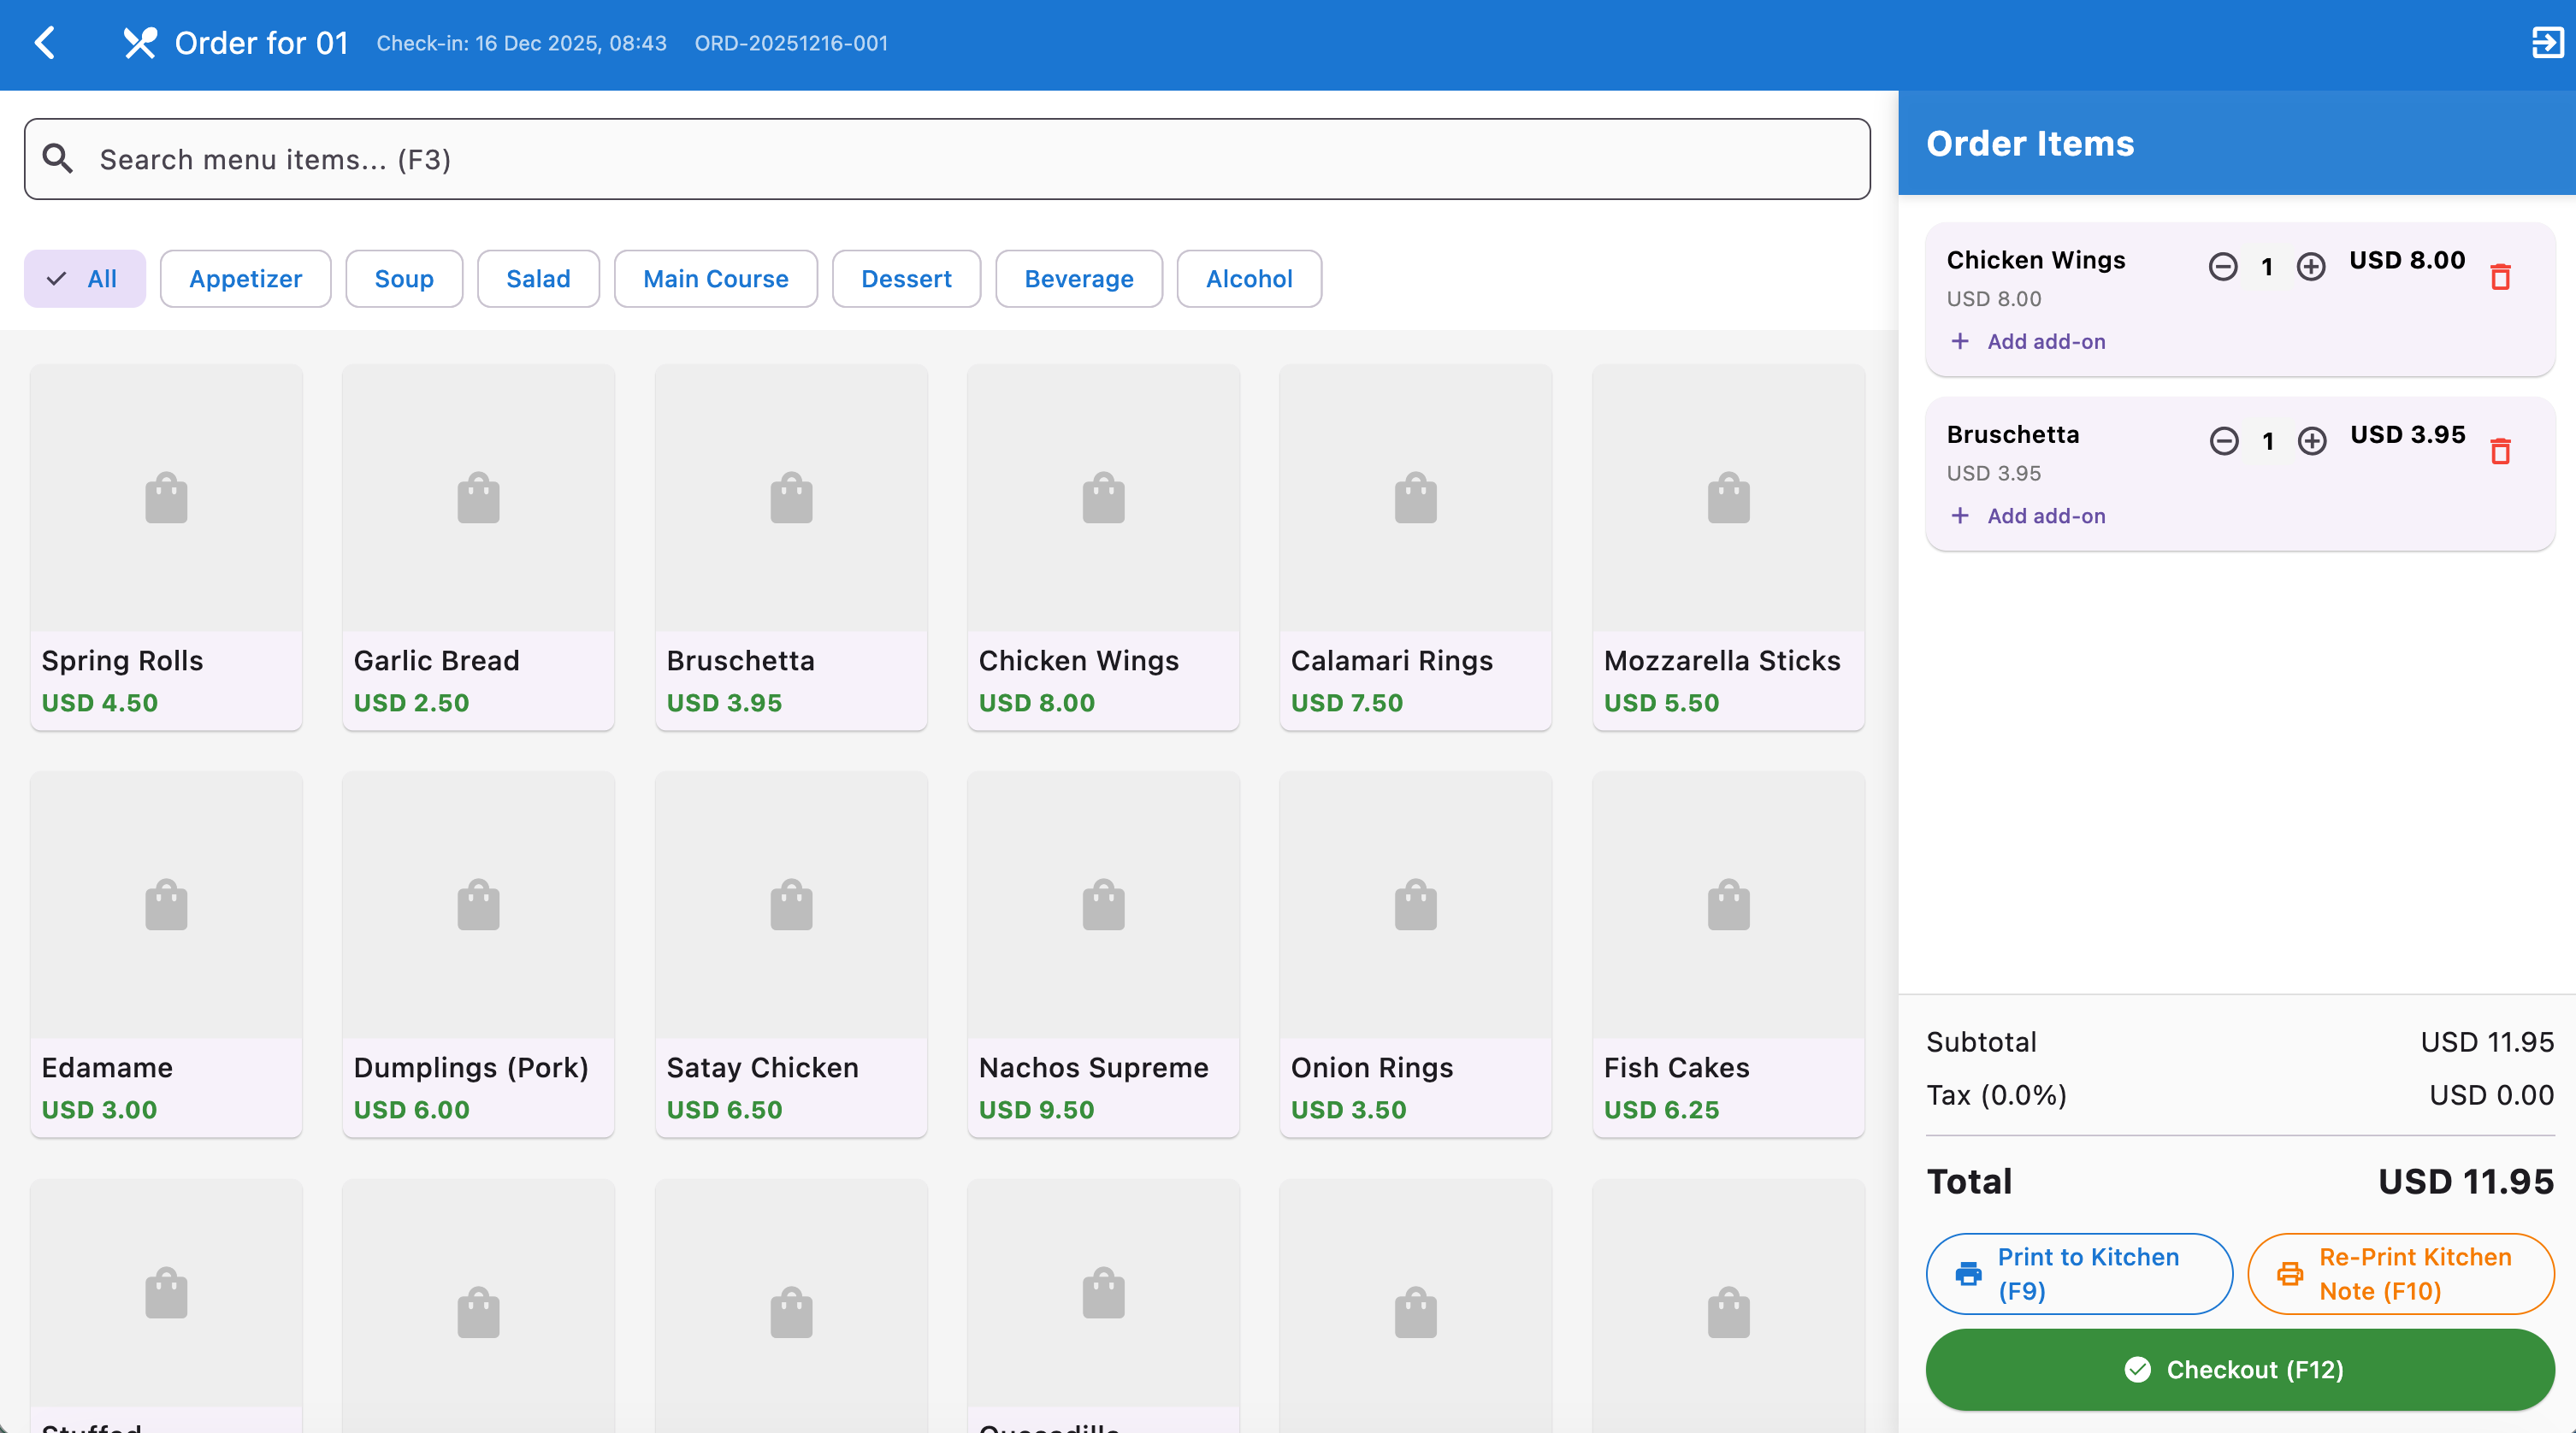
Adjust Quantity (if needed): In the Order Items list, you can use the +/- buttons next to each item to change the quantity or clicking on the same item to add.
Print to Kitchen (F9): Once the customer has finished their initial selection, click the Print to Kitchen (F9) button at the bottom right.
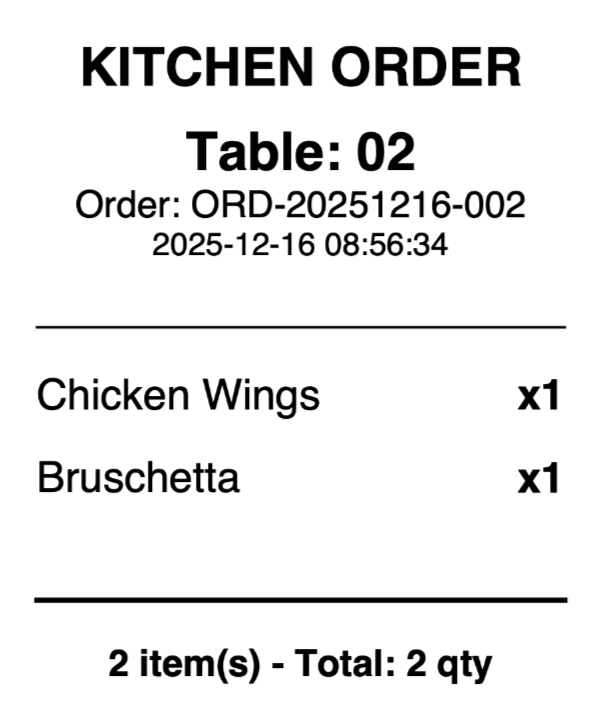
This sends the order to the kitchen printer.
Kitchen Print Example: The first print for Table 02 will show Chicken Wings x1 and Bruschetta x1 (pos-restaurant-order-kitchen-print).
¶ 3. Adding More Items to an Existing Order (2nd, 3rd time, etc.)
The POS is designed to handle subsequent orders as the customer stays at the table.
Return to the Order Screen: If you had navigated away, simply click the existing table (01) on the main floor layout screen.
Add New Items: Add any additional items requested by the customer to the Order Items list by clicking on it.
Example: Table 02 customer now orders Panna Cotta and Apple Pie (pos-rest-order-3.jpg). The subtotal updates to $21.95.
Print to Kitchen (F9): Click Print to Kitchen (F9) again.
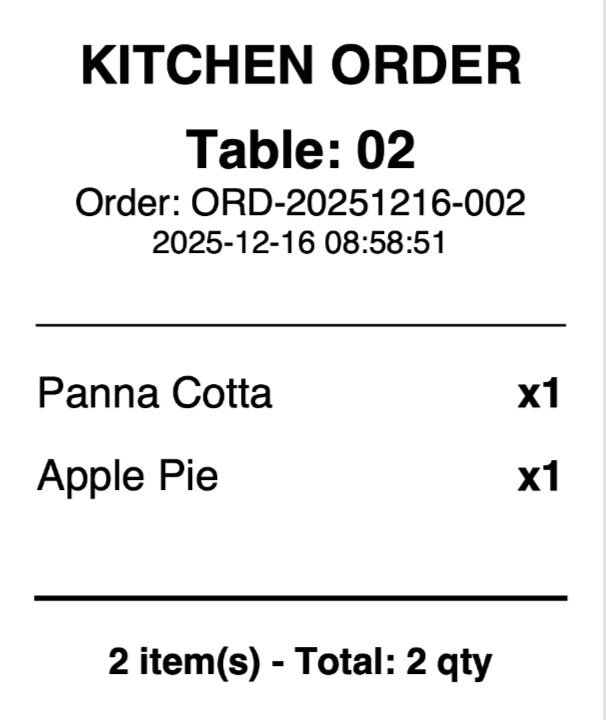
Important: This second print will only include the new items (Panna Cotta and Apple Pie), ensuring the kitchen does not mistakenly remake the items from the first print (pos-restaurant-order-kitchen-print-2).
¶ 4. Reprints and Verification
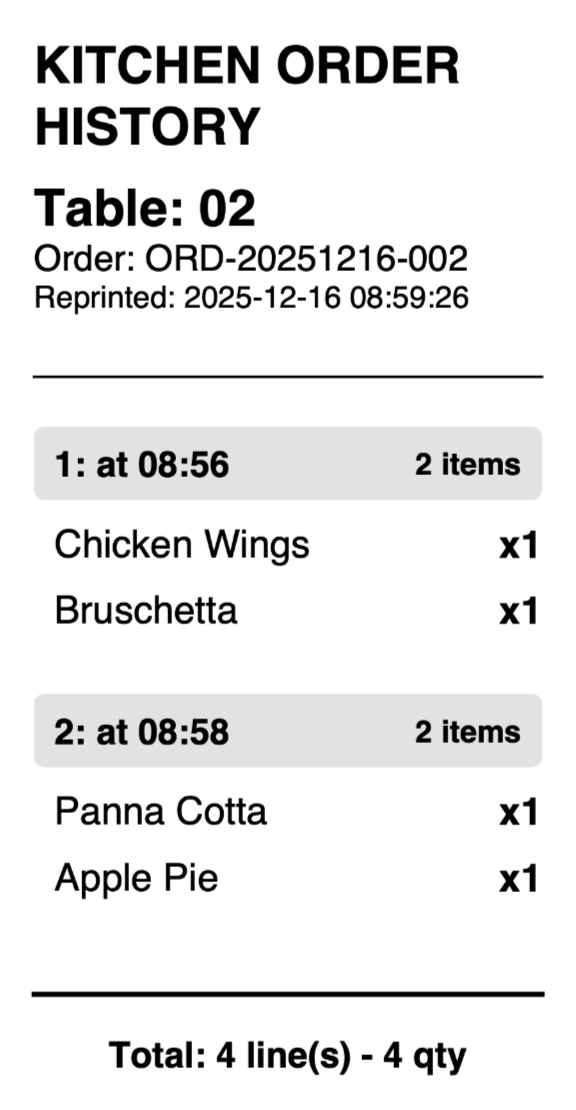
The system allows you to print a historical summary of the kitchen orders for verification, which is useful for communication between the operator and the chef.
Access Reprints: On the Order Screen, click the Re-Print Kitchen Note (F10) button.
Review History: The reprint will show a chronological list of all items sent to the kitchen for that table, grouped by the time they were ordered (version by version).
Example: The Kitchen Order History reprint for Table 02 (pos-restaurant-order-kitchen-reprint) clearly shows:
1: at 08:56 (2 items: Chicken Wings, Bruschetta)
2: at 08:58 (2 items: Panna Cotta, Apple Pie)
This reprint is the summary for verification purposes.
¶ 5. Completing the Payment
Go to Checkout: Once the customer is ready to pay, click on the Floor → Table → Order (in case one table has different customer order), then click the Checkout (F12) button on the Order Screen.
Review the Bill: The Checkout screen (pos-restaurant-checkout) summarizes the final bill:

Items: All items ordered across all versions.
Discount Coupon: Enter a code and click Apply if applicable.
Subtotal, Tax, and Total are clearly calculated.
Complete Payment:
Verify the Total amount.
Click the Complete Payment (F12) - USD 21.95 button.
Note: there is no payment detail screen so please make sure that customer paid before clicking on the Complete Payment (F12).
Order Completion: A pop-up window, Order Completed (pos-rest-checkout-complete.png), will appear:
It displays the Order Number (e.g., SO2512000002) and Total Amount.
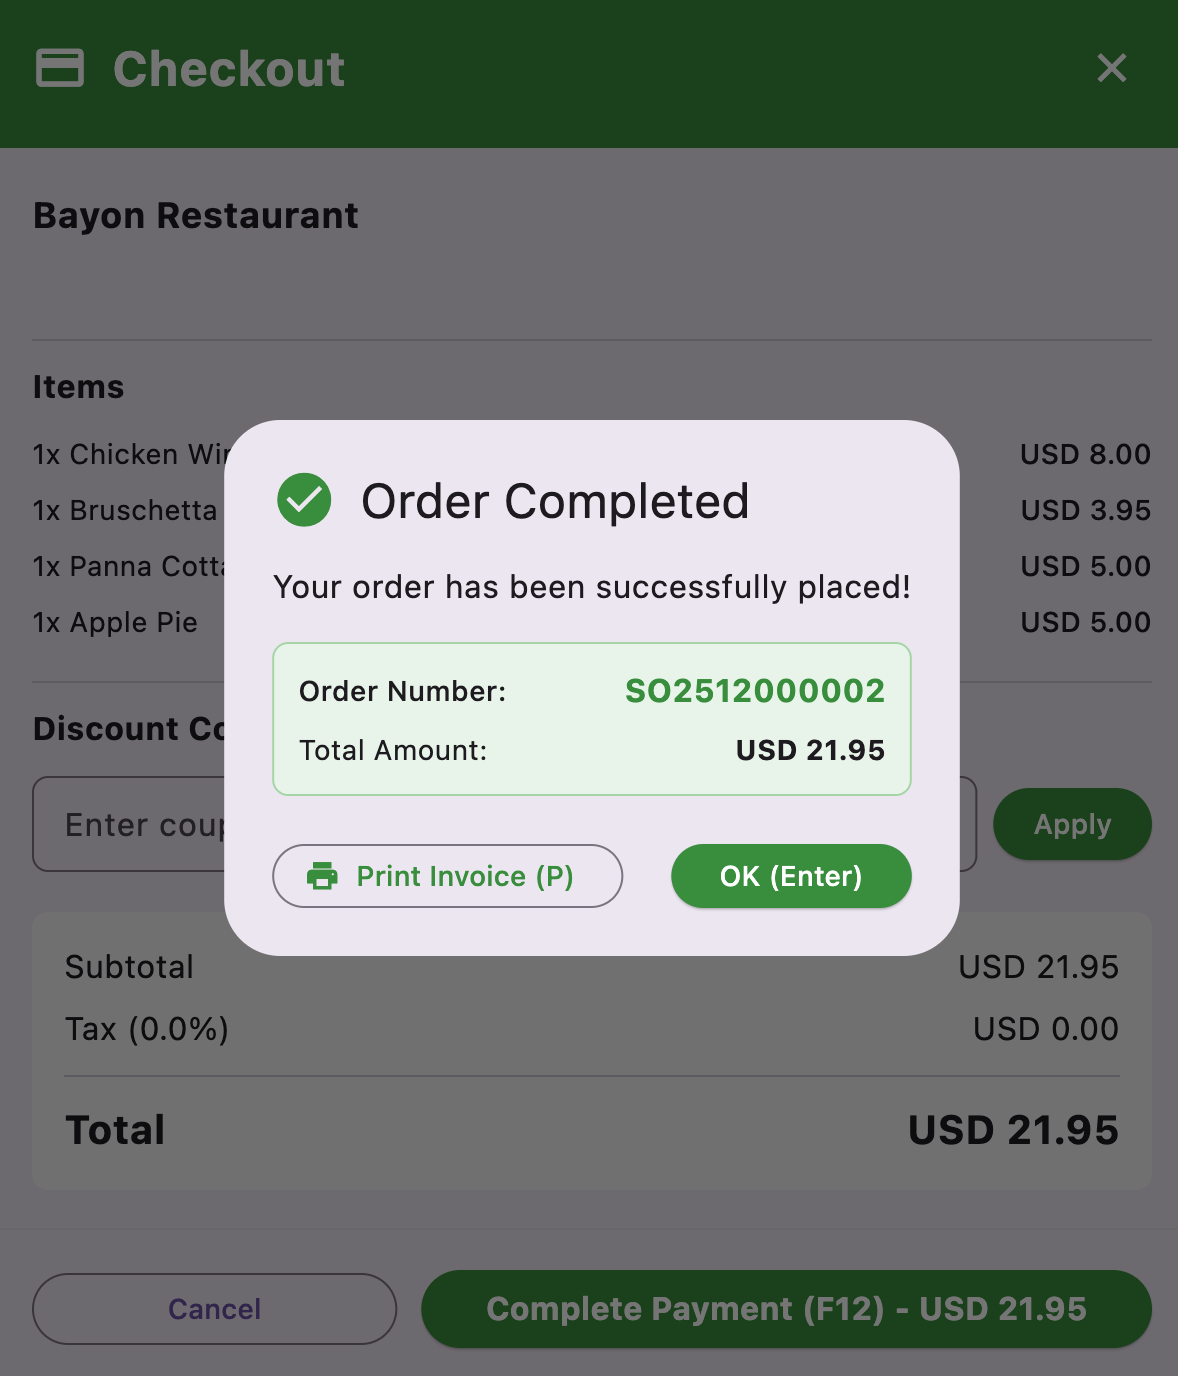
You have two options:
Print Invoice (P): Prints the customer receipt.
OK (Enter): Closes the window and returns to the main floor layout, making the table available again.