
Customers
Customers are the master accounts shared across CRM, Revenues, and other modules. Set them up before creating opportunities or quotations.
Navigation: left sidebar → CRM → Customers (/crm/customers).
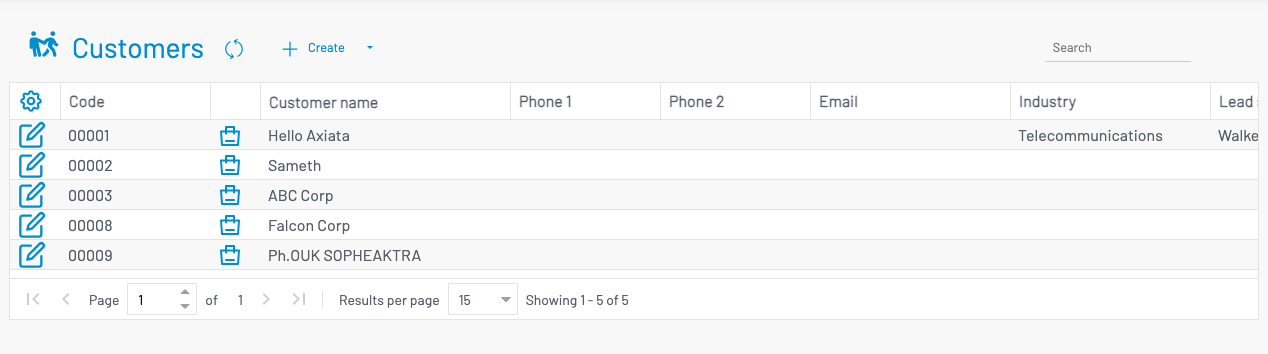
List columns
Section titled “ List columns”| Column | Description |
|---|---|
| Code | Auto-generated customer ID. |
| Customer name | Display name. |
| Phone / Email | Primary contact. |
| Account Handler | Assigned sales person. |
| Industry / Lead source / Nationality | Classification fields. |
| Remark | Notes. |
From the list, use the Sales History icon on a row to open Customer Sales History for that customer.
Import customers
Section titled “ Import customers”Use Upload on the Customers list (requires customer.create) to import or update customers from Excel.
- Click Upload and download the Customer Template (
/assets/customer-upload-template.xlsx). - Fill the sheet. Only name is required (for individuals you can supply first_name / last_name instead when is_corp is false). Use
(auto)for code to let Auto Numbers assign the next code. - Upload the file. Import runs in the background — you can keep working and will be notified when it finishes. The list refreshes automatically when done.
Rows match an existing customer by name (case-insensitive) or by code (when code is not (auto)). Matched rows are updated; others are created.
| Column | Notes |
|---|---|
| code | Use (auto) for new auto-numbered codes |
| name | Required (or first/last name for individuals) |
| is_corp | Corporate vs individual |
| first_name / last_name / title_of_courtesy / gender | Individual fields |
| vatin / id_card | Tax ID / national ID |
| industry / nationality / lead_source / price_level / tax_category (or tax_type) | Matched by list-of-values name |
| credit_term (or credit_terms) | Matched by Credit Terms name |
| account_handler | Matched by employee name |
| expat | Yes/No |
| phone_1 / phone_2 / email / fax / website | Contact |
| address_line_1 / address_line_2 / city / province / postal_code / country | Free-text address (Area hierarchy and map location are not in the Excel import) |
| remark / special_note | Notes |
Create a customer
Section titled “ Create a customer”Click + Create.
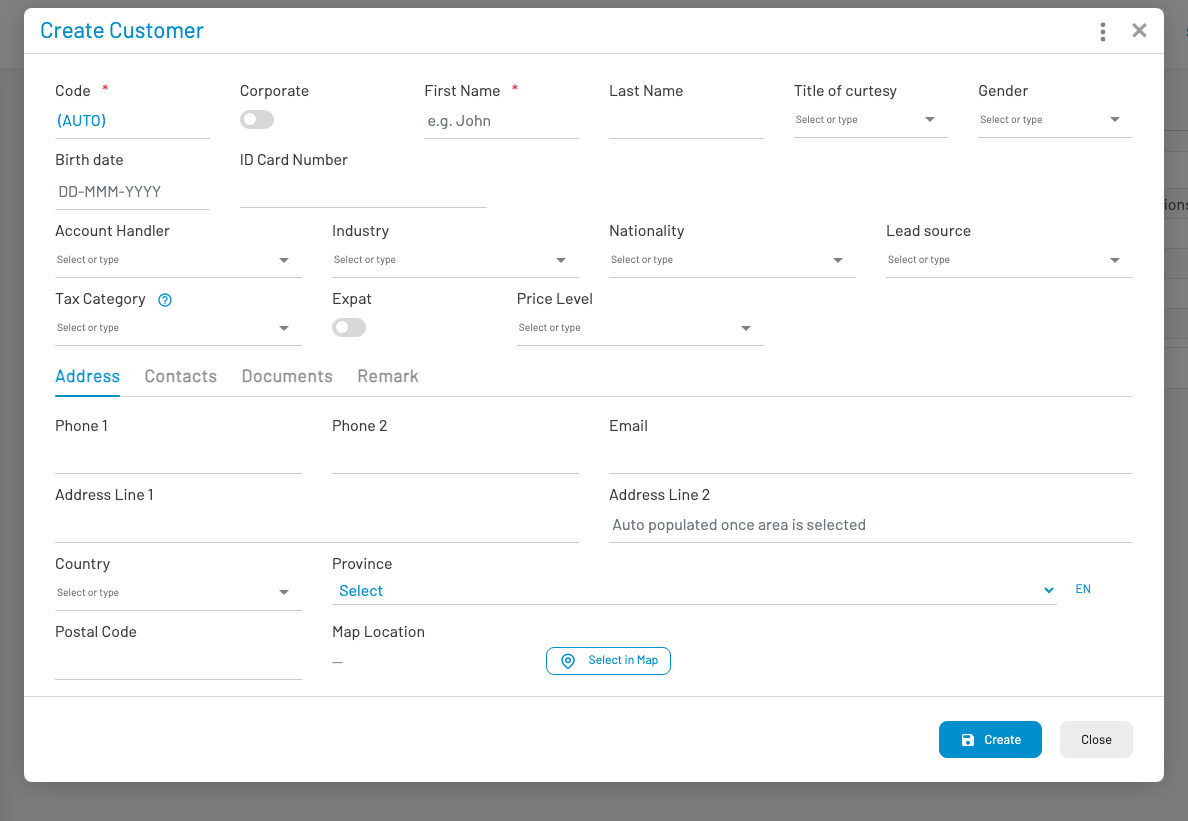
- Choose type: Individual (name fields) or Corporate (company name, VAT/sales tax ID).
- Set account handler, industry, nationality, lead source, tax category, Price Level, and Credit Terms as needed.
- On the Address tab, enter contact and location details (see below).
- On the Contacts tab (corporate): add contact persons.
- Save.
Customer code is auto-numbered — configure numbering under Auto Numbers if needed.
Price level
Section titled “ Price level”Price Level (list of values) sets the default selling price tier for this customer. When you add items on quotations, sales orders, and invoices, unit prices resolve from the item’s price table for that level (falling back to Regular when unset). Configure levels and prices on each Item.
Credit terms
Section titled “ Credit terms”Credit Terms sets the default payment terms for this customer (for example Net 30). The field is optional and searchable; you can create a new term inline.
When you select this customer on a quotation, sales order, or invoice, Credit Terms is copied onto the document. On invoices, changing Credit Terms recalculates Due Date from the document date plus the term’s Due days. Maintain the catalog under Credit Terms (Setup → Credit Terms).
Address
Section titled “ Address”On the Address tab:
| Field | Description |
|---|---|
| Phone / Email | Primary contact details |
| Address line 1 | Street / building |
| Address line 2 | Filled automatically from the area selection |
| Country | Country list of values |
| Area | Hierarchical picker (province → district/city → commune/sangkat → village) from Areas |
| Postal code | Optional |
| Map location | Latitude,longitude — use Select in map to pick a point, or open the link to view in Google Maps |
Area names come from the Areas master data. Maintain the hierarchy under Setup → Areas before relying on the picker.