Items
Items (also called products) are the goods and services you sell. Configure them before creating sales documents.
Navigation: left sidebar → Revenues → Data Setup → Items (/revenue/items).
Overview
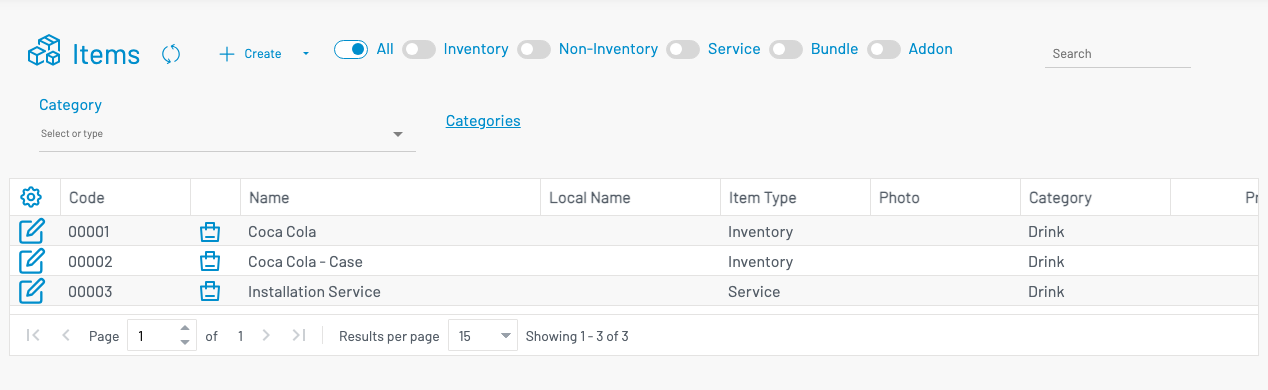
Section titled “ Overview”Use the filter bar to narrow by item type (Inventory, Service, and others) and category. Search finds items by code or name.
From the list, use the Sales History icon on a row to open Item Sales History for that item.
Create an item
Section titled “ Create an item”Click + Create to open the item form.
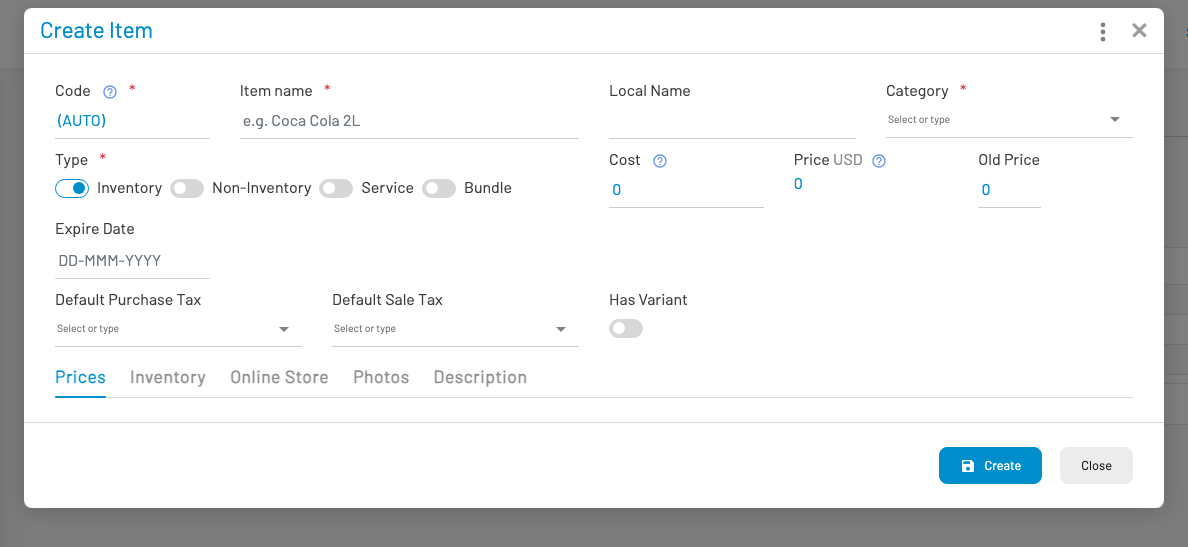
Enter at least:
Code and Name — Unique identifier and display name.
Type — Inventory, Service, or other configured types.
Category — Grouping used for reporting, filters, and (when GL is enabled) optional accounting overrides. Every sellable item should have a category.
Unit price and Tax — Defaults applied when the item is added to a sales document.
Save the item. Approve it if your workflow requires approval before use on transactions.
Accounting
Section titled “ Accounting”Sales items do not pick a GL account on the item form. When you approve an invoice (or related document), Accounting resolves accounts as follows:
| What posts | Account source |
|---|---|
| Sales revenue for this item | Category Sales account, if set; otherwise GL Account Mappings (Revenue for goods, Revenue Service for services) |
| Inventory / COGS (inventory-type items) | Category Inventory and Cost of goods accounts when set; otherwise the mapped Inventory / COGS roles |
| AR, tax, bank | Always from GL Account Mappings (and bank setup), not from the item |
Why assign a category carefully: if two product lines must hit different revenue or stock accounts, put them in different categories and set those accounts on each category’s Accounting tab. If every product can share one revenue and one inventory account, leave category Accounting empty and rely on GL Account Mappings alone.
Related stock items are also maintained under Inventory → Inventory Items.
Price levels
Section titled “ Price levels”On the item form, the Prices table supports multiple price levels (for example Regular, Wholesale) with optional effective dates.
- Use Add price level to create or pick a level from the price-level list of values.
- Enter a price for each level on a row; set an effective date when prices change over time.
- On the customer, set Price Level so quotations, sales orders, and invoices pick the matching unit price automatically.
If a customer has no price level, the Regular level is used.